Now that the desk is complete, a long three weeks including late nights at work and busy schedules, I got back to building the airplane last night. After sweeping up all the saw dust, the workshop was converted back to a sheet metal shop and solo airplane factory. I am starting on the tailcone, as this is the last part to complete in the empennage! And you can expect an updated completed structure overview in the near future to indicate the area of work in progress. Last night was mainly spent as described above with cleaning the shop but I got about an hour of work in making the aft tie down fitting and a couple parts of the bulkheads. I've noticed there have been an increase in parts you have to cut, shape, and match drill in this section. I wonder if this is going to continue into the fuselage. Tonight I continued on some bulkhead pieces, nothing major. I noted that one of the service bulletins and associated parts is included in my kit and set of plans. Good to know they keep the kits up to date on any changes they (Vans Aircraft) make.
Oh, I did build a rack to store the completed stabilizers and elevators in hopes of keeping them a little safer than just laying around in the shop. Mon (1.0) Tues (2.5)
Tuesday, July 3, 2012
Tuesday, June 12, 2012
Other Exciting News!
This is an airplane builders log and it should be kept to only news and events that have to deal with the aircraft. Well, I am the airplane builder and this event will affect most everything....in an exciting way. My wife and I are expecting our first child in December!!
For any others out there that are building an airplane while starting or raising a family you will understand and sympathize with the irritation I received from all the doomsayers when we announced our news. Many expect our lives to be over and the flying we do to go with it. We, of course, are very excited and see quite the opposite. There was a reason I chose a four seat aircraft. We see family excursions to the beach or out West. We see raising kids that will have some great stories and experiences to tell for the rest of their lives. We plan on raising a flying family. Say what you like, but I say were just getting started....
Completed Structure Overview (166.0hrs)
I completed another part so I'm updating the Completed Structure Overview. Below is a picture of all the aircraft structure, if its highlighted blue it is finished and red is in work.
Total Time 166 hrs
You probably noticed no parts are highlighted red, leading you to believe that nothing is in work, well you are correct. As of right now I converted the shop back to woodworking to build my wife a desk I have been promising her. Don't worry though, I expect to be back up and running as an airplane factory in a short while! The tailcone is next!
Sunday, June 10, 2012
Finished the Elevators
After installing the counterweights and trim tabs the elevators are now finished. The counterweights are just big chunks of lead that need to be cut down to size. This is a bit of a pain because of how soft they are. I eventually used a combination of a sawzall, a chisel, and a hammer to get the pieces to their final shape. The counterweights work great; below is a picture of me balancing the elevator on its hinge point, pretty neat.
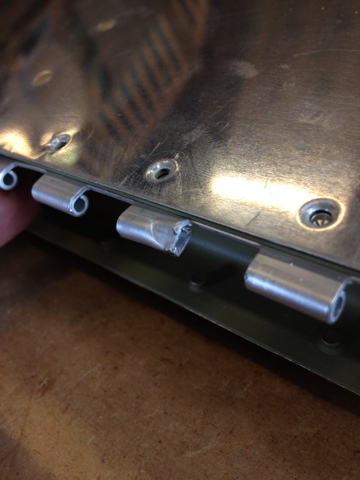
Now for the trim tabs. Of course I can't seem to finish a part without screwing something up. This time it was the piano hinge that attaches the trim tab. I was using the pneumatic squeezer and it crushed the hinge and the rivet. After some squeezer adjustments, drilling out about 15 rivets, and borrowing a hinge from my inventory of fuselage parts, I was back up and running in only a short while. I attached the hinge pin in the same style that I wrote about on 5/30 save a few changes that were made for the RV-10. When finished, I stood the elevators next to all the other parts I have built, just for a since of accomplishment, before calling it a night. Sat (5.0)
Thursday, June 7, 2012
Elevator Edges
Now that the ProSeal was good and dry I riveted the trailing edges. I did this the same way I did the rudder, with every other rivet facing the opposite direction. They are double flush rivets, flush on both sides, but facing them in opposing directions ensures that there won't be a bend or any warping on the trailing edge. I also finished the leading edges. (2.5)
Monday, June 4, 2012
Elevator Ribs and Edges
The trim tabs and elevator trailing edges use foam ribs to stiffen up the skins. The ribs are held in place by ProSeal which, when cured, will hold the ribs in place for a very long time. They're not structural they're used only to stiffen things up. The trailing edges also use ProSeal to hold the skins tight against a small aluminum wedge, this piece though will be riveted to the skins when everything dries up. In the pictures of the elevators it's the part being held in by, what looks like, about 100 clecos. I used the same method to measure the correct quantities of the two part mixture as I did with the rudder trailing edges...large syringes. I also clamped a good flat board to hold everything down while the sealant dries up. (2.0)
Sunday, June 3, 2012
More Elevators
After what feels like a little slacking for few days....you know only getting things done around the house and flying up to St. Louis to visit family...I had a free weekend to work on the plane. I assembled the two halves of the elevators together and riveted the skins to the spars. I riveted the small spars of the trim tabs on also. I rolled the forward edges of the skins to form the leading edge of the elevator. You do this by attaching a piece of PVC pipe using tape and clecos to the skins and with a great deal of force rolling the skins into shape. This bends the forward edges of the two skins which then get riveted together. The leading edges of elevators, rudders, and ailerons are tucked behind the stabilizers and wings and therefore don't need to be very aerodynamic, plus you can't see it anyway. This is the reason the leading edges are formed using two skins riveted together. Whereas a wing's leading edge would be smooth. Sat (6.5) Sun (5.0)
Subscribe to:
Posts (Atom)