
Saturday, March 31, 2012
Rudder Ready
After hours of deburring and dimpling holes, the rudder is ready to be primed. I had a little bit of help from a buddy of mine...thanks Mike. I also etched and alodined a few pieces that needed it and got a little start on the horizontal stabilizer. More on that tomorrow. Nothing of any real interest so no pics. (7.0)
Friday, March 30, 2012
More Rudder
I actually squeezed in a little time tonight. I match drilled all the holes in the skins and put the small bend on the trailing edges. I used a small wooden block tool that I made to make the bends. (1.5)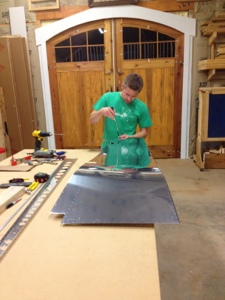

Thursday, March 29, 2012
Rudder Work
So another lesson learned tonight. When cutting aluminum with a saw...go real slow....duh. No I didn't lose any digits but complete destruction can happen quickly.
So I worked on the rudder for a while tonight. I deburred all the stiffeners that were pictured yesterday. A small belt sander works great for shaping the aluminum but it gets hot really quick. I also clecoed the skins on and they are ready to be match drilled. (3.75)

So I worked on the rudder for a while tonight. I deburred all the stiffeners that were pictured yesterday. A small belt sander works great for shaping the aluminum but it gets hot really quick. I also clecoed the skins on and they are ready to be match drilled. (3.75)
Wednesday, March 28, 2012
Structure Overview
I thought I would post this drawing of the RV-10 structure to show all the components that go into building this airplane. It might help to see where I'm at and how far I have to go.
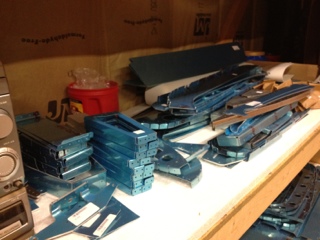
Started Rudder
Well I got as far as I could on the vertical stabilizer. At least, without priming the parts before final assembly. So I started on the rudder. Didn't get very far except cutting out several stiffeners, see pic.
Oh, and the rib I messed up on will only cost me $9.25 plus shipping for a new part, so not too bad. (3.0)
Oh, and the rib I messed up on will only cost me $9.25 plus shipping for a new part, so not too bad. (3.0)
Research and Install Plans
This post lists out some research I have done for what systems need to be installed and when. I needed to find out what was going in the tail, specifically the vertical stabilizer, before closing it up when the skins are installed. The same goes for a lot of other parts of the airplane. So I needed to learn a little more installation details about the specific systems of the RV-10.
Elevator Trim
I plan to replace the the Ray Allen Relays for a more controllable trim. Everything else (ie: the servos in the kit, the trim tabs, elevator, etc) is installed per plans.
Safety Trim Link:
http://www.vansaircraft.com/cgi-bin/catalog.cgi?ident=1332944162-376-720&browse=airframe&product=safety-trim
Tim Olson did a great write up on the whole trim problem thing here:
http://www.myrv10.com/N104CD/upgrades/20071027/index.html
I need to look into the airspeed control that controls the trim rate for this system.
Tail
Nothing else will go in the tail (VS, HS, rudder) except the required position/strobe light that is required for night VFR and IFR operations per FAR 91.205. This light installs on the bottom of the rudder in the fairing which is already molded to accept a light. There is not enough room on the top of the tail for an antenna or anything else, so conduit will not be ran throught the VS or rudder.
Antennas
All antennas will be installed in the fuselage after assembly.
Lights
Still need to do research on lights to be installed in the wings.
Some links:
http://www.vansaircraft.com/cgi-bin/catalog.cgi?ident=1332944162-376-720&browse=lighting&product=AeroLEDs
http://www.aeroleds.com/
http://www.deemsrv10.com/decisions.html
Autopilot
I will probably go with Dynon as my EFIS and they offer an autopilot solution. The servos are purchased separately, from Dynon, for both the ailerons and elevator controls and attach to the bellcranks. The elevator control attaches to an area in the fuselage (I think) and the aileron control attaches in the wing somewhere. Something to remember when building the wings.
http://www.dynonavionics.com/docs/support_documentation.html
See autopilot section
Rudder Trim
I do not want to alter the rudder and add extra weight to the very light frame so I will not be adding a servo with a trim tab to the rudder. I plan on building a spring system to change the forces on the rudder pedals themselves. This is something I can do even after building.
http://www.myrv10.com/tips/mods/RudderTrim/DonOrrick.html
Aileron Trim
If I even add this it will be the system from Vans. Something I can install after the aircraft is flying if required.
http://www.vansaircraft.com/cgi-bin/catalog.cgi?ident=1332944162-376-720&browse=airframe&product=ea-kit
So it looks like I can close up all the parts without pre wiring except for the wings. That's good news. So...keep building.
Tuesday, March 27, 2012
Vert Stab Disaster
I started dimpling the skin and ribs for the vertical stabilizer tonight. All was going pretty smoothly until...I screwed up. Using the DRDT-2 dimpler is great. It's easy, quick and the dimples come out spot on, see pics below. The screw up happened when I was using the pneumatic squeezer to make the dimples in the ribs. It jumped out of the hole and punctured a new one, rookie mistake. So this, I'm sure, will only be my first mistake and others will follow, I just hope not many. I'll be ordering a new rib in the morning. (2.25)


Sunday, March 25, 2012
Vertical Stabilizer
Today was my first full day I had to work on the airplane. I didn't damage anything and my efficiency is improving, so I'm happy. Things were a bit mundane at first but then the ribs and skins started going on and it started to look like a real airplane part! (6.5)


Flying for Primer
Yesterday (Saturday) I flew with my friend and instructor, Caroline, to Aircraft Spruce (KFFC) to pick up supplies including: primer (AkzoNobel two part epoxy), etching acid (Alumiprep 33), and chemical conversion coating (Alodine 1201). My plan for corrosion protection is to etch, alodine, and prime all bare aluminum and just MEK wash and prime all clad pieces. The thin layer of pure aluminum on the face of the clad parts is naturally corrosion prohibitive and only a light coat of primer will ensure the plane will last a long time.
Back to the flight....
We took the flying club's Cessna 182 so, while making the trip, I could get my high performance endorsement which will allow me access to another airplane. I even got some actual IMC time which is always fun. All in all, a good and productive flight!

Back to the flight....
We took the flying club's Cessna 182 so, while making the trip, I could get my high performance endorsement which will allow me access to another airplane. I even got some actual IMC time which is always fun. All in all, a good and productive flight!
Friday, March 23, 2012
Ready, Set, Build
This is Day 1. I officially started building an airplane today! Not a common sentence to say. Of course it started off slow with a learning curve. Right now that curve looks daunting but I can tell even after just a few hours of work I'll become more efficient as I progress. Of course I started in the tail, the vertical stabilizer to be exact, and...well...haven't made it very far.
At the end of each post I'm going to have some numbers in parenthesis. These are the hours I spent that day building, periodically they will be tallied up to track my build time. Most builders seem to finish the airplane at around 2300hrs or so.
Today (2.5)
At the end of each post I'm going to have some numbers in parenthesis. These are the hours I spent that day building, periodically they will be tallied up to track my build time. Most builders seem to finish the airplane at around 2300hrs or so.
Today (2.5)
Wednesday, March 21, 2012
Parts...LOTS of parts!
Ok, so one disadvantage of buying the tail and fuselage together is that you get a lot of parts. We started unloading as soon as we got home. That wasn't too bad. Each sub kit is wrapped together and can be easily carried to the shop from the street. Didn't take too long. Now when you start opening those sub kits it starts out like Christmas, excited to see what's inside, but after while that wears off and the "where the $&@t am I going to put all this" starts to set in. The issue is that each easy to carry sub kit has several parts that it comes with. I estimate I received around 450 parts total today. We started inventory, but will continue into tomorrow. Still excited though!


Tuesday, March 20, 2012
Patience and Anticipation
Years of planning, day dreaming, and talking about building a plane. Then, you finally order the kit and wait an eternal 8 weeks for it to ship. I placed the order for the tail and fuselage of the RV-10 a little over 8 weeks ago (mid January) and am currently watching it travel across the nation: Aurora OR, Portland, Denver, Wichita, Oklahoma City and now in Memphis. The final trek to Huntsville should be happening today. It will be arriving in two boxes; one 8ft long and 600lbs and the other 10ft long and 280lbs. The plan, for now, is to load them on a flatbed trailer, park in front of the house, crack open the crates, and start carrying pieces to the workshop in the back yard....stay posted for updates tomorrow.
- Justin
To see pics of my shop go to our other blog "The Life and Adventures of Justin and Jess".
- Justin
To see pics of my shop go to our other blog "The Life and Adventures of Justin and Jess".
Friday, March 16, 2012
Introduction
The Blog
This blog, as the subtitle states, is to create a real time builders logbook to document and share the experience and efforts of building a home-built airplane. My expectations for the site is to periodically post what I'm doing and, if I feel inspired, how I'm doing it.
The Pilot
As the usual story goes, I have always wanted to fly...yadda yadda, fast forward to recent history. I started flight training in January 2009 and, with my great instructor Caroline, I quickly passed my checkride in May 2009 all while working full time and taking several engineering courses. The entire spring break was spent in the air. I took my wife up in the Cessna 152 the same day I passed and we haven't stopped flying since. I moved up to the 172 shortly after and then earned my IFR rating in 2011. As of the writing of this blog I have around 240hrs and climbing. For a little more info about us see our linked blog The Life and Adventures of Justin and Jess.
Experimental Aircraft
Many people hear home-built airplane and think Home Depot or picture an Ultralight buzzing around. Well home-built, or experimental, aircraft have evolved over the last several decades. Many outperform their certificated counterparts and for a fraction of the cost when compared to a new airplane. Also, as I see it, the most important aspect of building your own airplane is that your do not have the restrictions of a certificated aircraft. You can alter, change, update, repair, maintain, inspect as much as you desire without the regulation and costs of getting everything "qualified". It's actually illegal for a pilot to work on his certificated airplane unless he is a certified mechanic. With an experimental aircraft you can work on, maintain, and inspect your own aircraft as you see fit, you would know what's best...you built it.
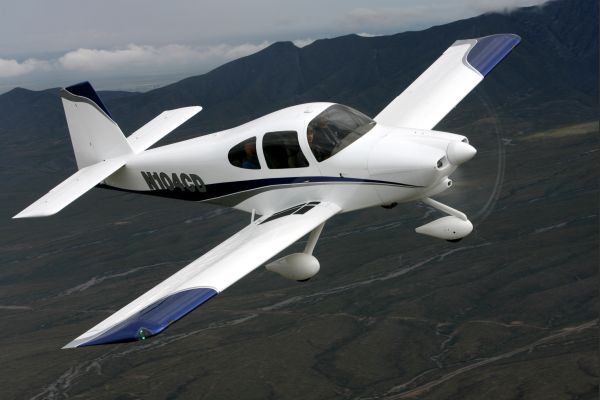
The Airplane
The airplane that I am building is an RV-10. It's a high performance cross country machine. You can fit four full size adults with luggage and still have room and weight to spare for fuel. It's a beautiful airplane and handles, so I hear, very well. You cruise comfortably around 165 knots (190mph) with a top speed of 183 knots (211mph). To really understand how fast that is I usually state "Well, I'll be able to fly from here (Huntsville, AL) to Chicago in under three hours, oh, and without TSA, waiting in line, or lost luggage". My wife is most excited about the flights to the beach, a 7 hour drive, in 1 hour and 45 minutes. All that speed and you can still takeoff and land in under 1000ft on a grass strip if so required. I'll be installing an IO-540 Lycoming 260hp engine with an engine monitoring system (EMS). I plan on installing a full electronic flight instrumentation system (EFIS or glass cockpit) and will have synthetic vision, moving map, terrain, traffic, and weather. Truly state of the art electronics that will improve all aspects of flight.
Performance numbers as posted on the Vans Aircraft website.
This blog, as the subtitle states, is to create a real time builders logbook to document and share the experience and efforts of building a home-built airplane. My expectations for the site is to periodically post what I'm doing and, if I feel inspired, how I'm doing it.
The Pilot
As the usual story goes, I have always wanted to fly...yadda yadda, fast forward to recent history. I started flight training in January 2009 and, with my great instructor Caroline, I quickly passed my checkride in May 2009 all while working full time and taking several engineering courses. The entire spring break was spent in the air. I took my wife up in the Cessna 152 the same day I passed and we haven't stopped flying since. I moved up to the 172 shortly after and then earned my IFR rating in 2011. As of the writing of this blog I have around 240hrs and climbing. For a little more info about us see our linked blog The Life and Adventures of Justin and Jess.
Experimental Aircraft
Many people hear home-built airplane and think Home Depot or picture an Ultralight buzzing around. Well home-built, or experimental, aircraft have evolved over the last several decades. Many outperform their certificated counterparts and for a fraction of the cost when compared to a new airplane. Also, as I see it, the most important aspect of building your own airplane is that your do not have the restrictions of a certificated aircraft. You can alter, change, update, repair, maintain, inspect as much as you desire without the regulation and costs of getting everything "qualified". It's actually illegal for a pilot to work on his certificated airplane unless he is a certified mechanic. With an experimental aircraft you can work on, maintain, and inspect your own aircraft as you see fit, you would know what's best...you built it.
The Airplane
The airplane that I am building is an RV-10. It's a high performance cross country machine. You can fit four full size adults with luggage and still have room and weight to spare for fuel. It's a beautiful airplane and handles, so I hear, very well. You cruise comfortably around 165 knots (190mph) with a top speed of 183 knots (211mph). To really understand how fast that is I usually state "Well, I'll be able to fly from here (Huntsville, AL) to Chicago in under three hours, oh, and without TSA, waiting in line, or lost luggage". My wife is most excited about the flights to the beach, a 7 hour drive, in 1 hour and 45 minutes. All that speed and you can still takeoff and land in under 1000ft on a grass strip if so required. I'll be installing an IO-540 Lycoming 260hp engine with an engine monitoring system (EMS). I plan on installing a full electronic flight instrumentation system (EFIS or glass cockpit) and will have synthetic vision, moving map, terrain, traffic, and weather. Truly state of the art electronics that will improve all aspects of flight.
 |
| Thanks to Tim Olson for his great web site and inspiration. |
 |
| Thanks also to Scott Schmidt for his inspiring photos. |
Performance numbers as posted on the Vans Aircraft website.
| Light Weight 2200 lbs | 210 hp | * 235 hp | 260 hp |
| Speed | |||
| Top Speed | 200 mph | 204 mph | 211 mph |
| Cruise [75% @ 8000 ft] | 190 mph | 194 mph | 201 mph |
| Cruise [55% @ 8000 ft] | 170 mph | 174 mph | 180 mph |
| Stall Speed | 57 mph | 57 mph | 57 mph |
| Ground Performance | |||
| Takeoff Distance | 475 ft | 415 ft | 360 ft |
| Landing Distance | 500 ft | 500 ft | 525 ft |
| Climb/Ceiling | |||
| Rate of Climb | 1,400 fpm | 1,669 fpm | 1,950 fpm |
| Ceiling (est) | 17,077 ft | 20,538 ft | 24,000 ft |
| ------------------------------------------------------------- | |||
| Gross Weight 2700 lbs | 210 hp | * 235 hp | 260 hp |
| Empty Weight | 1,520 lbs | 1,585 lbs | 1,600 lbs |
| Speed | |||
| Top Speed | 197 mph | 201 mph | 208 mph |
| Cruise [75% @ 8000 ft] | 186 mph | 190 mph | 197 mph |
| Cruise [55% @ 8000 ft] | 166 mph | 170 mph | 176 mph |
| Stall Speed | 63 mph | 63 mph | 63 mph |
| Ground Performance | |||
| Takeoff Distance | 686 ft | 583 ft | 500 ft |
| Landing Distance | 650 ft | 650 ft | 650 ft |
| Climb/Ceiling | |||
| Rate of Climb | 1150 fpm | 1,221 fpm | 1,450 fpm |
| Ceiling (est) | 13,678 ft | 16,839 ft | 20,000 ft |
| Range in statute miles "sm" | |||
| Range [75% @ 8000 ft] | 951 sm | 883 sm | 825 sm |
| Range [55% @ 8000 ft] | 1,153 sm | 1070 sm | 1000 sm |
Friday, March 9, 2012
Blog Trial
This first blog entry is to, honestly, just figure out how to use blogger. I'm sure I'll get the hang of it quickly and we'll be up and running quickly, until then....patience.
Subscribe to:
Posts (Atom)