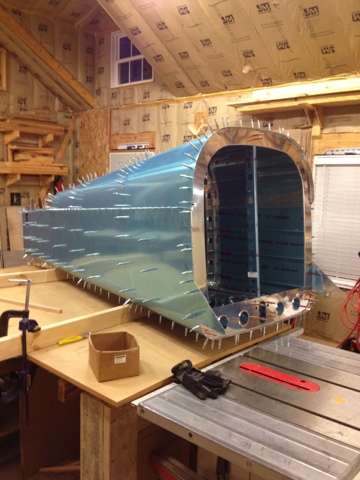
The tailcone goes together pretty quick. All of the longerons and stiffeners have to be match drilled, but once you drill out one the pace increases with the others. There are a lot of holes to drill, giving the air compressor a pretty good workout. To work on the tailcone the instructions say to use 38" tall sawhorses. I decided that it would be better to clamp two 2x4s on end to the table letting one side of them overhang. This would allow movement around and under the part a lot easier without sawhorse legs getting in the way. Also making moving and rolling the part really easy and since I left the blue film on the skins i didn't need to worry about scratches. You start building the RV-10 tailcone upside down letting the frames hang on the lower skin. Then the stiffeners and longerons are attached. The side skins go on with a little bit of work and force to get the frames lined up in the large corner radii. After that roll the thing right side up and continue clecoing parts on. There are two really thick pieces of angle extrusion that run the entire length of the tailcone that form the main longerons. Before installing them they need a 2 degree bend in them formed by a vice and a mallet. I was a little skeptical of this step at first but the parts turned out great and my repertoire of metal bending at home has now expanded.
Being able to roll the entire part over was a major help while building this thing. I don't know if anyone out there is building an RV-10 but if so I highly recommend the 2x4 set up. Also the frames need to be fluted and this causes the edges of the frame tabs to curl up and could cause an ugly bulge in the skins. So I curled only the edges of the tabs back down to prevent this. --Look at that! Applying a lesson learned from the horizontal stabilizer : ).
The upper skins of the tailcone come flat and are shaped as you cleco them in place. I had to give the entire part a good bear hug a few times to hold the skins in place while clecoing with the free hand.
Looking at the pictures it appears I'm nearly finished with this section, but don't be fooled, I still need to deburr, dimple, prime, reassemble, and rivet.....a long way to go.
Sat (5.0) Sun (6.0)


No comments:
Post a Comment