Showing posts with label interior. Show all posts

Tuesday, March 10, 2015

Interior Panels and Paint

Weather forecast: Sunny and 60+ degrees ....So I stopped what I was doing and started prepping for paint. With a break from the winter weather, and the need to paint the interior before I start getting too much installed, I decided to shift gears for the weekend and paint. I had spent an entire day fitting the interior panels and cutting whatever I needed to before paint.

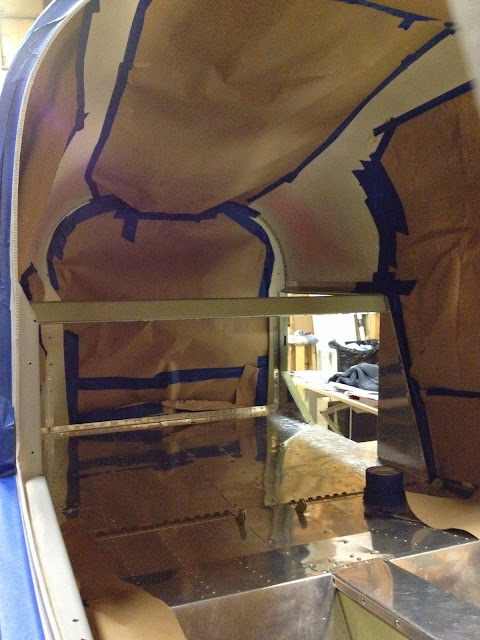
I masked off....um, almost everything.

Lots of masking. This takes more time then the painting. I only wanted to paint the door frame, the rear cross bar, around the baggage door, and a few other exposed areas.

The bulk of the painting happened outside. I painted the door interiors and all the interior panels outside.

The rear baggage bulkhead, side panels, interior door handles, and even the little screw buttons all painted.

Aside from running out of paint and my wife having to make an emergency pick up (best wife ever) everything went really well. Painting on the table with the parts laying flat is MUCH easier then if the were in the plane sitting vertical. It's nice to not have to think about this step anymore.

Monday, February 24, 2014

Cabin Top is Painted

Woohoo....time to paint a part of the interior!
I'm pretty excited about this! It feels like a major milestone. I'm excited to finish and paint the cabin top and overhead. Then I'll install the cabin top for good!

There was a lot prep work that went into this and I'll let my pics and daily tasks lay it all out.

Dates and Times
Tues 18 -1.5 hrs- Sanded canopy with 100grit to smooth everything out
Wed 19 -1.5 hrs- Same as yesterday
Thurs 20 -0.75 hrs- Same as yesterday and the day before that
Fri 21 -0.75 hrs- Sprayed with grey high build primer from spray can...same as before when I primed the overhead for the first time
Sat 22 -3.0 hrs- Sanded with 180 grit and then with 220 to get everything really smooth. Wiped it all down and sprayed the overhead first with a really dark grey color I picked out from Sherwin Williams exterior car paint. Both my colors are Range Rover exterior colors (not intentional...just happened that way).
Sun 23 -2.0 hrs- Taped/masked the overhead dark area and then sanded the rest with 220 to smooth out the overspray from yesterday. I then sprayed my really light tan color on the rest. I plan on installing a headliner so the entire top is not painted for that reason.


Original primer sanded down until smooth. Any pin holes filled...again.

After a second coat of primer and more sanding I sprayed my first color.

Masking and more sanding I sprayed my second color.

A close up of the lip. It all looks really good and the pictures don't do it justice. I'm really happy with the results...and of course you need to imagine the closeout panels installed. I'll have a few touch up details and the painting of the overhead will be complete.


I used Sherwin Williams Dimension paint. It is an Acrylic Enamel exterior car paint. The two cans on the right are the two color base paints. You mix the reducer and hardener per the instructions and then add the flattening agent (can on the left). I added an almost 1:1 ratio of paint to flattener to make an almost completely flat look. The finish has a slight "eggshell" reflection back....which is exactly what I had hoped for. I won't be spraying a clear coat.

Tuesday, February 18, 2014

Interior Paint

Friday was an exciting day. I bought paint for my interior (I'll dish out the details of my paint choices later when I actually paint). The time is getting close to finishing the cabin top and overhead and then it will be permanently installed onto the fuselage. Before the installation day I want to  paint the overhead areas. It will be a lot easier to paint it now then after it's installed. I've been dreaming about the interior probably before I even started building the plane. I wanted a dual tone, cream and charcoal, look. Classy yet sporty. Here are a couple inspirational interior pictures to show my colors. Once I complete a few more details on the overhead it will be time to paint! I can't believe I'm at this point in the build...I still have a lot of stuff to do, but this is pretty exciting!

Interior of Tesla

Interior of Lamborghini

Interior of another high end, very expensive car that I don't remember the name but liked the interior.