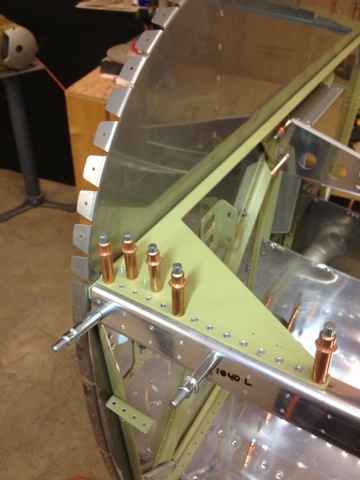
This is the upper left hand firewall bracket (WD-1002). View looking up.
The bracket is made from 0.063" 4130 steel.
Here is a closer view of the holes. View looking forward.
As you can see the edge distance reduces to almost nothing in the aft holes.
Note a total of 9 rivets in the upper tab of the bracket.
I traced the shape of the part using some lexan and marked a cut line just forward of the fourth hole.
Picture of the WD-1002 upper flange after the cut. I used other pieces of steel to shield the existing parts while cutting to prevent any accidental strikes from the cutting wheel.
The new parts. I don't won't to call them repair parts, but I guess that's what they are.
Starting on the left: upper spacer, aft spacer, splice strap.
Upper spacer is 0.125" 6061-T6 shaped to taper down to 0.063" on the outboard side
Aft spacer and splice strap are 0.063" 4130 steel (same material as the WD-1002 Bracket).
The spacers and strap celecoed in place. The upper spacer is sitting under the primer green firewall stiffener and above the cut upper tab of the firewall bracket. The aft spacer is sitting just aft of the cut. and the splice is on the bottom spanning the entire length.
With this view you can see the 4 new holes in the firewall stiffener web inboard from the existing line. These four new holes go through the upper spacer, upper firewall bracket tab, and the splice. These holes are important as they allow the upper firewall bracket tab to have 9 rivets as was originally designed (now with better edge distance), replacing the 4 holes removed. Equally important is that the new holes go into the spice to carry the load into the aft holes as was originally designed.
View looking down with rivets installed.
Ignore the sloppy green primer. View looking up and forward. You can see the new 4 inboard holes making a total of 9 rivets shared by the tab and the splice. The splice strap actually extends beyond what the original tab did picking up 5 additional rivets aft of the original. The splice, being made of the same type of material, can carry the load into the existing structure as intended. The "repair" or "redesign" is actually stronger than the original with the improved edge distance and additional aft rivets.


No comments:
Post a Comment